SYSTEM PREFERENCES
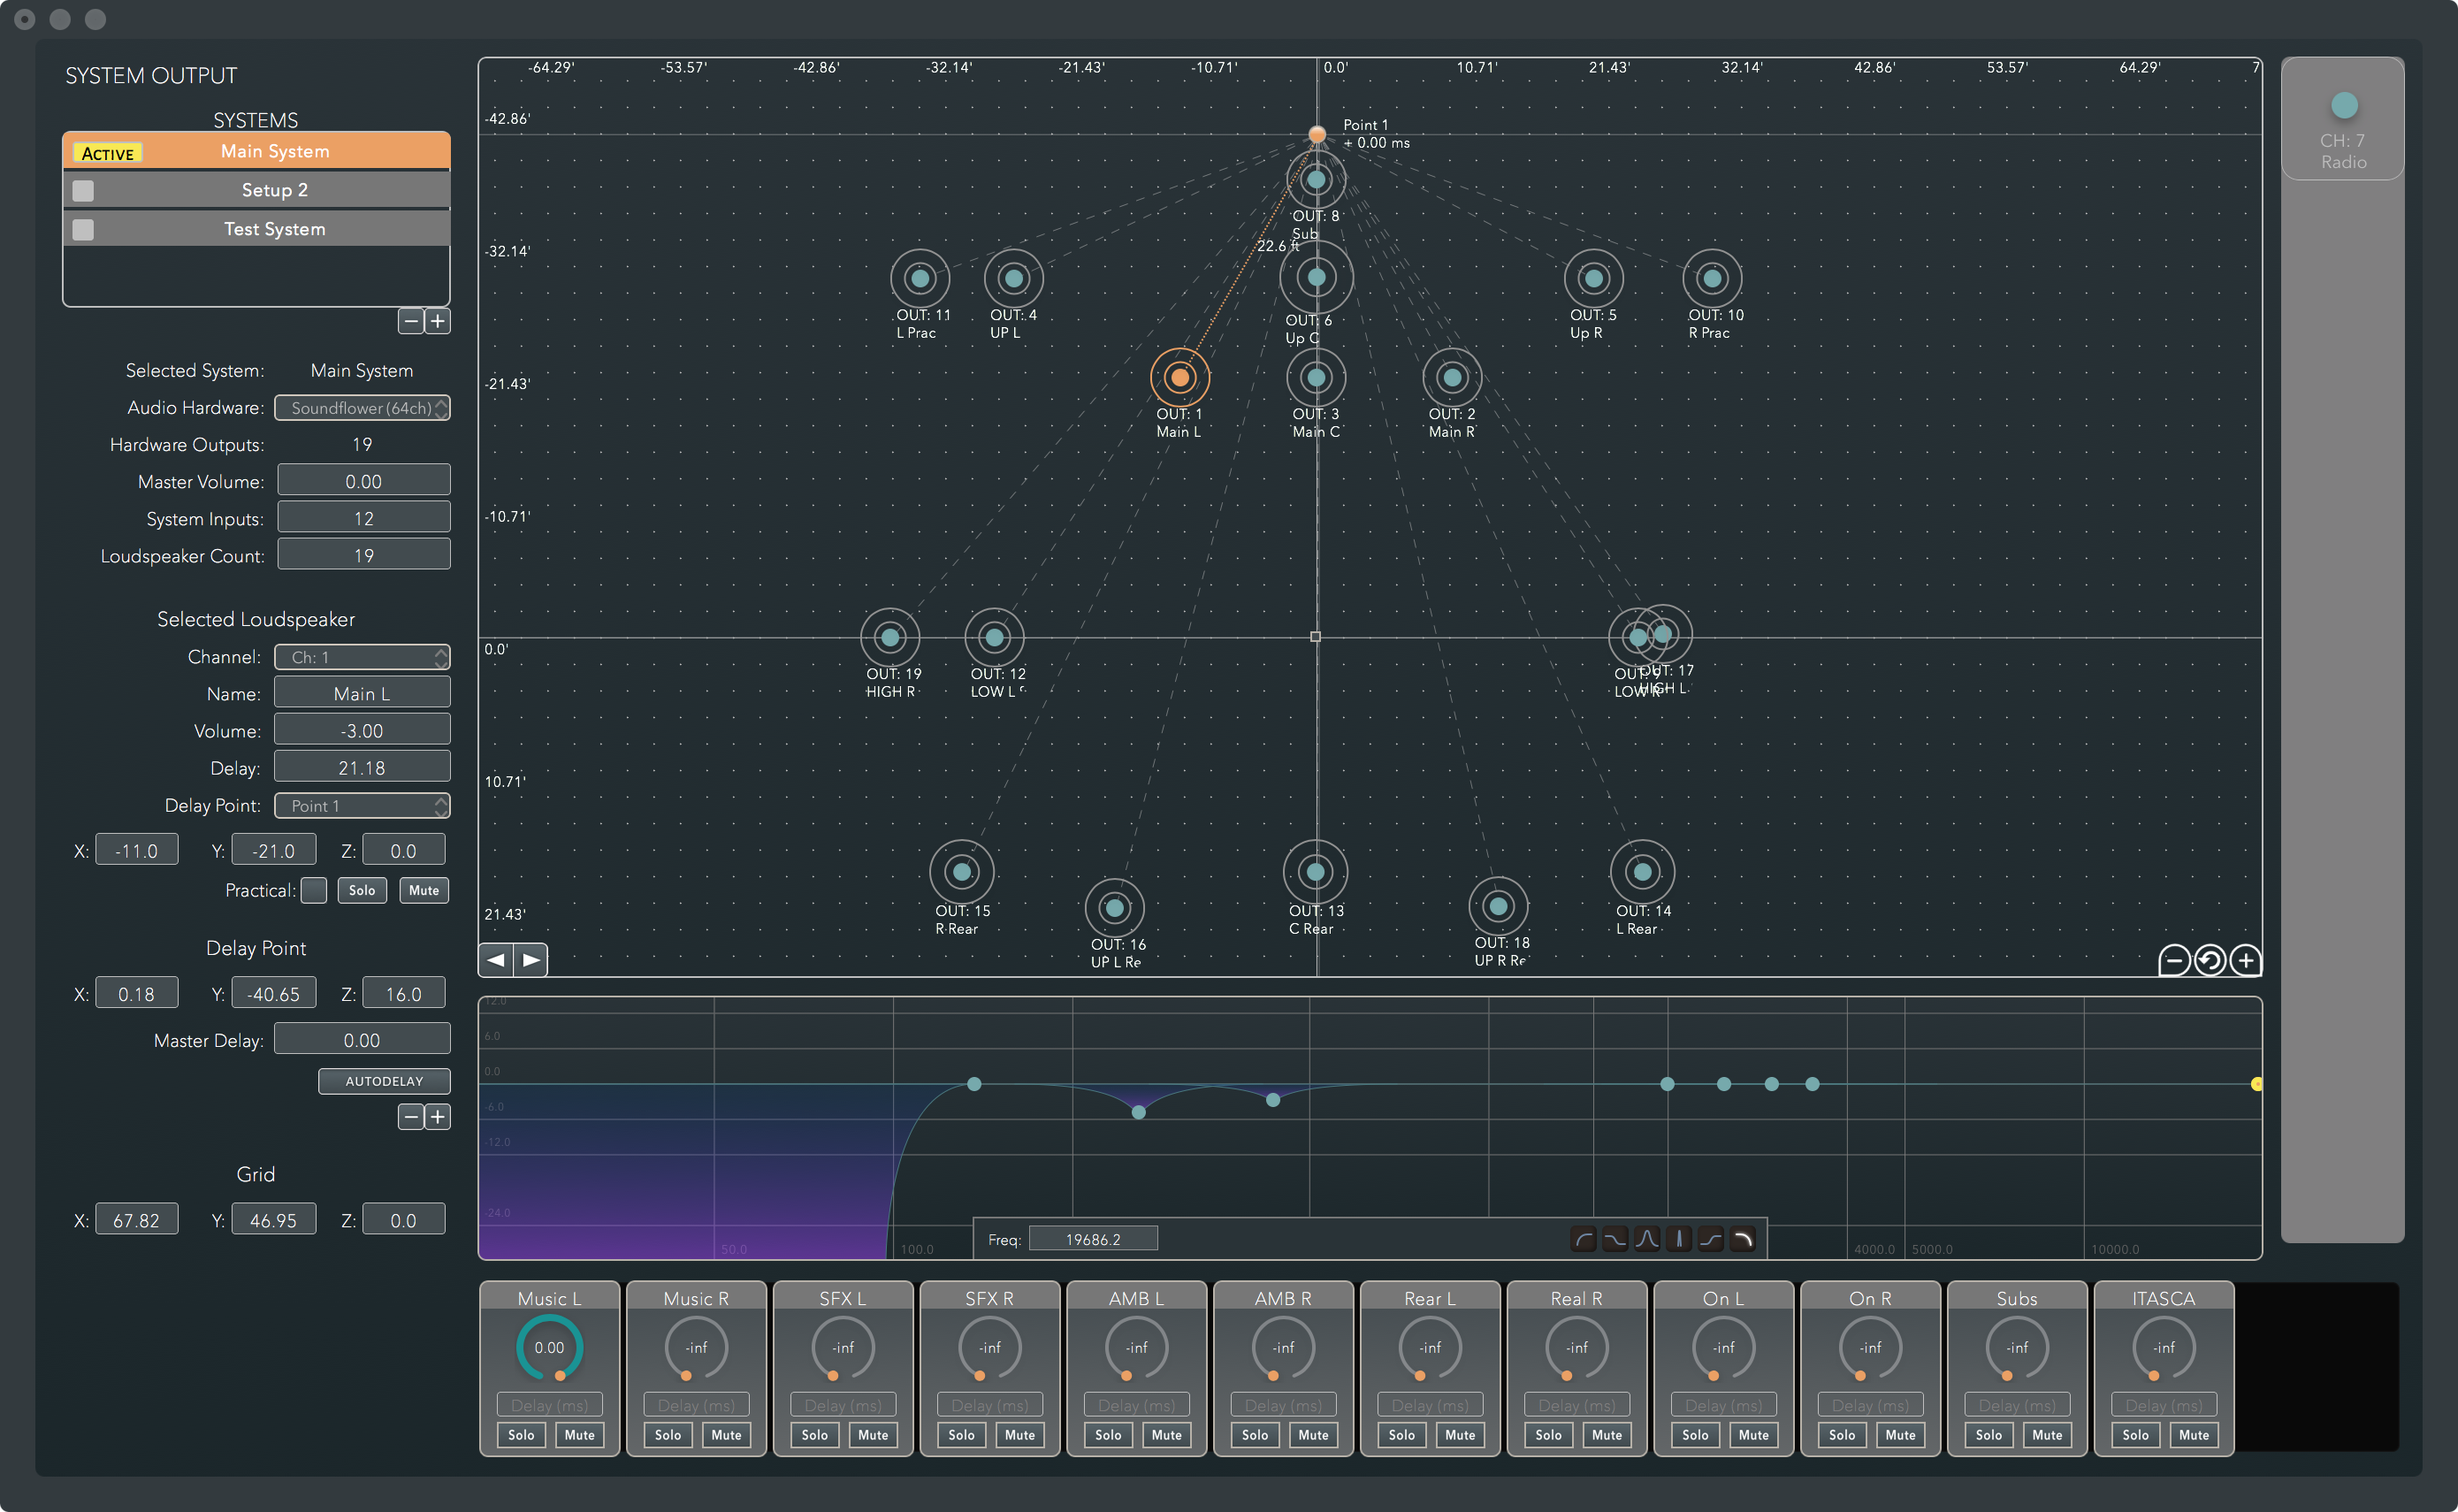
The system output page is how you set up, control, and output your audio system. It allows you to build you system in dimensional space, and how that corresponds to your audio output card. The active system recieves input from all your canvases system element and routes the audio to your audio output card.
Systems
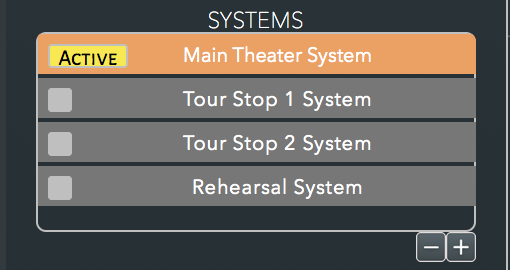
A user can have multiple systems in the project. Each system is a set of levels, delays, EQ, loudspeaker layouts, and output cards. You can switch between active systems by clicking the Active button on the left of the Systems Table. This allows you to build systems for different applications, such as a rehearsal system, or systems for each stop on a tour.
Active System
The active system is the system the output of your canvases goes to, and the currently working output card. You can select which system is active by hitting the Active button in the system's row. When the system is not active, making changes will not affect what is currently playing, as only changes to the currently active system will be made live.
Selected System
The currently selected system has a few global preferences you can adjust. They include:
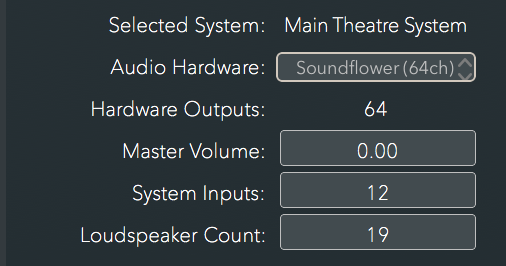
- System Title: You can change this in the systems table.
- Audio Hardware: You can change the hardware connected to the selected system to any audio output cards currently attached to your computer.
- Hardware Outputs: This is the output count of the currently selected audio hardware. You can see I am using the Soundflower(64ch) hardware attached to my computer, and and the Outputs tells me I have 64 channels to use (this will not be as obvious with some output cards).
- Master Volume: The overall volume of the selected system.
- System Inputs: The amount of input channels you would like to use in the system. (See Input Mixer for more information). This changes the System Elements on all the canvases to have this many outputs.
- Loudspeaker Count: This is the amount of outputs you would like to use in your system and corresponds to the number of loudspeakers shown in the loudspeaker grid. This number can be greater than the output count, enabling you to build your system without having the correct hardware attached to your computer. (For example, if you wanted to work offline at home, and bring it ready to go to the theatre). As you can see, I am using only 19 of the 64 inputs available to me.
Input Mixer

The input mixer corresponds to the output from all the systems elements and is mixed here. Each system element has the same amount of outputs as the system page has inputs, and is routed 1 to 1. You can change the number of inputs in the "System Inputs" text box. (See "Selected System").
Each Channel of the input mixer has:
- Channel Name
- Selected Loudspeaker Volume: Each loudspeaker in your system can have a different mix of input levels going to it. This allows you to either run your system 1 to 1, or you can change the mix to have multiple levels going to the same loudspeaker. For example, a LCR system (Left, Center, Right) might have the left channel of music going to only to the left loudspeaker, and the right channel of music going to the right loudspeaker, but you might choose to send a summed-mono to the center loudspeaker (pictured here at -6db).
- Delay: Each input can have it's own delay.
- Solo: Solo the inputs which you want to hear. This is a similar mechanism to all mixer consoles, it mutes every channel not soloed, and you only hear that channel.
- Mute: Mutes the inputs you don't want to hear.
Selected Loudspeaker
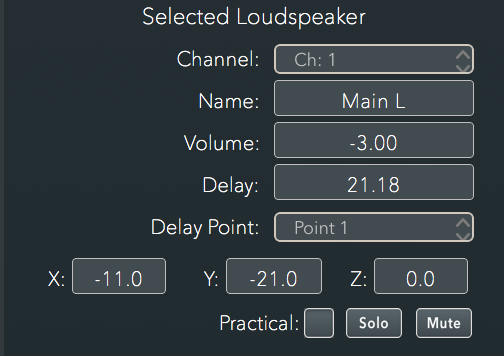
Each loudspeaker in your system has multiple parameters that you can change.
- Channel: This corresponds to the selected audio output card's output channel which the loudspeaker goes to. Each output channel can only have one loudspeaker routed to it.
- Name: Name of the loudspeaker.
- Volume: Volume of the loudspeaker.
- Delay: Delay of the loudspeaker. (This is affected by autorouting).
- Delay Point: If there are multiple delay points in the system, you can select which delay point that the loudspeaker is measured from.
- X/Y/Z: The measurement from center for the loudspeaker. This is Cartesian Coordinates, and is currently measured in feet.
- Practical: Selects the loudspeaker as a practical, which removes it from the grid, and places it in the practical loudspeaker view. This also removes the speaker from being affected by autodelay.
- Mute: Mutes the loudspeaker.
- Solo: Solos the loudspeaker.
Delay Points
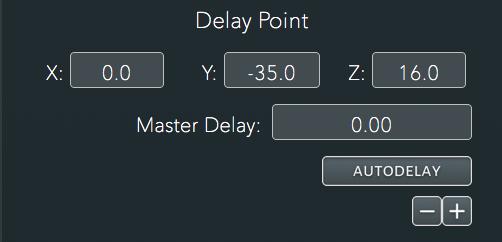
- X/Y/Z: The coordinates of the currently selected delay point.
- Master Delay: Adds a delay to all outputs.
- AutoDelay: This will autodelay all the loudspeakers in the currently selected system.
- +/- : Add / remove delay points in the system.
Loudspeaker Grid
The loudspeaker grid is a 2D representative layout of your loudspeaker system. This enables you to have a visual representation of the system, and allows you to setup delay points and build delays into your system easily and efficiently.
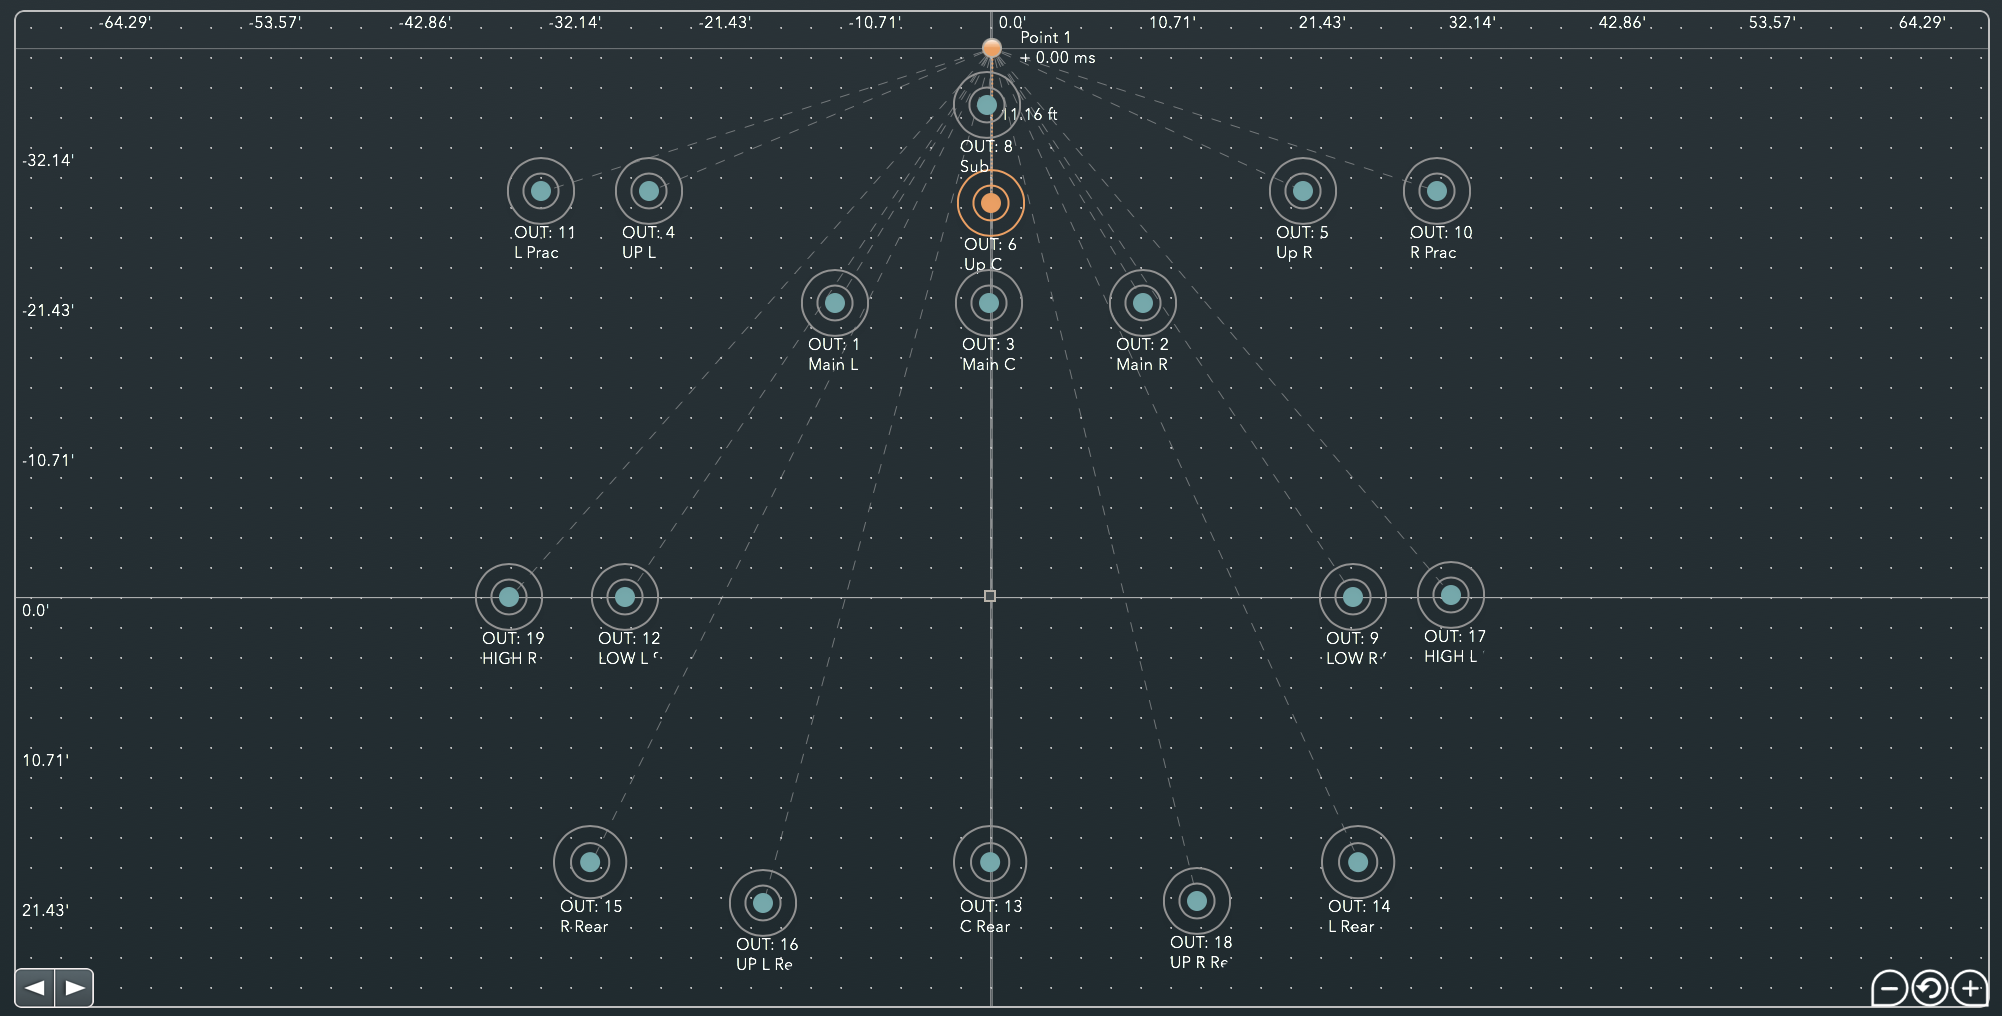
- Grid Center: The center point of the grid can be manipulated to wherever you would like to set your 0,0 point for measuring the distance for your loudspeakers.
- Delay Points: A user can have multiple delay points. This is the point where the autodelay will calculate your delays for you.
- Loudspeakers: Each Loudspeaker is represented by a circle on the grid. The selected loudspeaker will be orange. If muted, the center ring will be red, and if soloed, it will be yellow.
- Next / Previous Loudspeaker: The arrow buttons in the bottom lefthand corner will take you to the next selected loudspeaker.
- Zoom In / Out / Restore: The plus/minus buttons on the bottom right hand corner of the system page allow you to zoom in or out of the system. The center button restores the zoom back to its original level.
EQ
The EQ view shows the EQ for the currently selected loudspeaker. Each EQ point may or may not have the following options, depending on the type.

- Frequency
- Q (or bandwidth)
- Gain
- EQ Types:
- High Pass
- Low Shelf
- Parambolic
- Notch
- High Shelf
- Low Pass
TO SET UP YOUR SYSTEM FOR AUTODELAY:
- Input the number of loudspeakers in the current system (Loudspeaker count text box)

- Measure the distances for each loudspeaker from the center point. A great way to do this is with a laser measure or CAD drawings.
- Input the distances from center in the selected loudspeaker. Repeat for all loudspeakers. Check the practical button if you would like the loudspeaker to not be autodelayed.

- Set the delay point to where you would like to delay your system back to.

- If you have more than one delay point, select which delay point you would like to have that loudspeaker measure from.

- Hit the "Autodelay Button." (This will auto delay all the loudspeakers in the currently selected system.)

